About Delightsofculinaria

Find more about me on:

Here are my most recent posts

image_print

Buffalo Wings

buffalo wings
image_print


buffalo wings

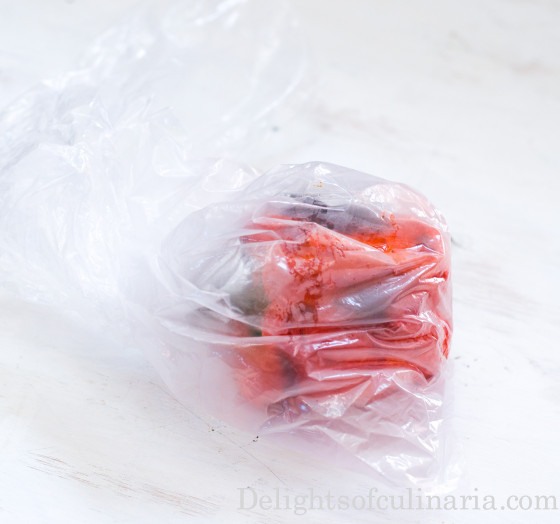
As we all know buffalo wings are a popular game day party food.And no need to take out or to buy some in the freezer section of your grocery store,because….they are so easy to make at home,much healthier and so tasty.These are baked until the skin is nice and crispy then tossed with  Franks hot sauce. Simple ingredients,easy method,and amazing finger licking results.

Ingredients:

30 chicken wings

3/4 cup Franks Hot sauce

4 tablespoons butter

salt and pepper.


Direction:

Heat oven to 500 degrees

Bring a pot of water to boil.

Season water with salt.

Throw in wings.

Cook for 5 minutes.

Drain the water.

Season wings with more salt and black pepper.

Arrange on a cooling rack.

Place cooling rack on top of rimmed baking sheet.

Add water to the bottom of the pan.

Bake for 25- 30 minutes one side,then another 20-30 minutes the other side or until skin is golden in color.

Heat sauce and butter in a small sauce pan until butter is melted.

Place wings in a bowl and toss with sauce.Let rest for about 3 minutes and toss again.


Buffalo Wings

Ingredients

  • 30 chicken wings
  • 3/4 cup Franks Hot sauce
  • 4 tablespoons butter
  • salt and pepper.

Instructions

  1. Heat oven to 500 degrees
  2. Bring a pot of water to boil.
  3. Season water with salt.
  4. Throw in wings.
  5. Cook for 5 minutes.
  6. Drain the water.
  7. Season wings with more salt and black pepper.
  8. Arrange on a cooling rack.
  9. Place cooling rack on top of rimmed baking sheet.
  10. Add water to the bottom of the pan.
  11. Bake for 25- 30 minutes one side,then another 20-30 minutes the other side or until skin is golden in color.
  12. Heat sauce and butter in a small sauce pan until butter is melted.
  13. Place wings in a bowl and toss with sauce.Let rest for about 3 minutes and toss again.
Schema/Recipe SEO Data Markup by ZipList Recipe Plugin
http://delightsofculinaria.com/buffalo-wings/

Hot BBQ wings

Hot BBQ wings
image_print

Hot BBQ wings


These Hot BBQ Wings are a creative twist to original buffalo wings.This recipe was inspired by my brother-in-law Alex  who also cooks amazing plov and is a pro at grilling. He deep fries wings in batches to get a perfect result of crispy wing on the outside and moist and juicy on the inside.I decided to bake instead, and with a little trick the result of  crispy and moist wing is achieved. You can make them either way and enjoy!

Ingredients:

30 chicken wings.

1/2 cup favorite bbq sauce *

1/2 cup Franks Hot sauce

2 tablespoons butter

1/2 lemon squeezed

salt & pepper

*If your bbq sauce too tangy,add some sugar to the sauce to balance out the flavor.

Direction-

1.Bring pot with water to a boil.

2.Season water with salt.

3.Throw in wings and cook for 5 minutes.

4.Transfer wings to a bowl and season more with salt,pepper and lemon juice.

5.Heat oven to 500 degrees.

6.Arrange wings on a cooling rack.

7.Place cooling rack on top of rimmed baking sheet.

8.Add some water to the bottom of the pan.

9.Bake for 30 minutes.

10.Turn wings over and bake for another 20-30 minutes or until wings are golden brown.

11.Heat both sauces in a sauce pan with butter. ( add sugar if needed)

12.Place wings in a bowl and toss with sauce. Let rest for 3-5 minutes and toss again.

I sprinkled some minced cilantro on top.

Hot BBQ wings

Ingredients

  • 30 chicken wings.
  • 1/2 cup favorite bbq sauce *
  • 1/2 cup Franks Hot sauce
  • 2 tablespoons butter
  • 1/2 lemon squeezed
  • salt & pepper
  • *If your bbq sauce too tangy,add some sugar to the sauce to balance out the flavor.

Instructions

  1. 1.Bring pot with water to a boil.
  2. 2.Season water with salt.
  3. 3.Throw in wings and cook for 5 minutes.
  4. 4.Transfer wings to a bowl and season more with salt,pepper and lemon juice.
  5. 5.Heat oven to 500 degrees.
  6. 6.Arrange wings on a cooling rack.
  7. 7.Place cooling rack on top of rimmed baking sheet.
  8. 8.Add some water to the bottom of the pan.
  9. 9.Bake for 30 minutes.
  10. 10.Turn wings over and bake for another 20-30 minutes or until wings are golden brown.
  11. 11.Heat both sauces in a sauce pan with butter. ( add sugar if needed)
  12. 12.Place wings in a bowl and toss with sauce. Let rest for 3-5 minutes and toss again.
  13. I sprinkled some minced cilantro on top.
Schema/Recipe SEO Data Markup by ZipList Recipe Plugin
http://delightsofculinaria.com/hot-bbq-wings/


Lemon Layer Cake

Lemon cake
image_print


Lemon cake

The idea of making this lemon layer cake came from my sisters bridal shower back in September ’13.It was when I had to make a cake that had lemon or honey in it.Well… I ended up making both a lemon cake and honey cake. Basically that was our theme because our  sister Sweet-lana loves her tea with lemon and honey as much as one loves their coffee.She’ll have it in her to-go cup everywhere she goes.

For the cake as pictured above I made total of four layers and made more cream by half. Added blueberries inside.

For bridal shower I sliced the layers in half,but it was hard to keep the cake from falling apart. The cake layers are very delicate.

And I used pureed raspberries with sugar(strained) instead of whole raspberries.


DSC_3985


DSC_3994


Ingredients:

( Cake batter adapted from America’s Test Kitchen)

2 1/4 cups flour*

1/4 cup cornstarch*

1 cup whole milk,at room temperature

6 large egg whites,at room temperature.

2 teaspoons vanilla extract

1 3/4 cups granulated sugar

4 teaspoons baking powder

1 teaspoon salt

12 tablespoons unsalted butter at room temperature.

lemon zest of 2 lemons

* you can substitute these two ingredients of cake flour


Cream for 1 (2 layer ) cake:

1 1/2 cups heavy whipping cream

8 oz. cream cheese

1  1/4 cup powdered sugar

1 tablespoon squeezed lemon juice

1-2 tablespoons limoncello liqueur

zest from one lemon

Syrup:

1/2 cup hot water

3 tablespoons sugar

3 tablespoons limoncello

2 tablespoons lemon juice.

-Combine all ingredients and let cool.


Fresh blueberries,raspberries or strawberries.

Whole or pureed with some sugar.


Direction for cake-

Preheat oven to 350 degrees

Sift flour with cornstarch 3 times and set aside

In a large measuring cup,whisk together the milk,egg whites,lemon zest and vanilla.

In the bowl of a standing mixer fitted with the paddle attachment,mix together the flour,sugar,baking powder and salt at med-low speed.

With the mixer running,add the butter pieces one at a time until the mixture resembles fine,even crumbs.

Stop the mixer and about 1/2 cup of the wet ingredients.

Beat the batter at medium speed until it is pale and fluffy,about 1 1/2minutes.

With the mixer running on med-low pour in  the rest of the wet ingredients,then crank the speed back up to medium and beat for 30 seconds more.Scrape down the bowl and beat for 30 more seconds.

Divide the batter equally among the two (9 inch) cake pans and smooth the tops.

Bake for 23-25 minutes,or until a toothpick come out clean-do not over bake.

Let the cakes cool in pans for 10 minutes,then remove the cakes from pans,and cool completely.


Cream-

In a mixer with whisk attachment ,whip cream cheese with powdered sugar.

Scrape the bowl and add lemon juice,zest, and limoncello.Whip again until ingredients are well incorporated.

On med-low speed gradually pour heavy whipping cream,bringing the speed higher gradually.

Whip the cream until stiff peaks.


Assembling-

Pierce first cake layer with toothpick or fork.

Pour/spray syrup on the cake.

Spread a good amount of frosting.

Arrange preferred berries on top of frosting.

Place the other cake on top of berries.

Pierce the cake and pour/spray syrup.

Spread frosting all over cake and decorate as desired.


Lemon Layer Cake

Ingredients

  • ( Cake batter adapted from America's Test Kitchen)
  • 2 1/4 cups flour*
  • 1/4 cup cornstarch*
  • 1 cup whole milk,at room temperature
  • 6 large egg whites,at room temperature.
  • 2 teaspoons vanilla extract
  • 1 3/4 cups granulated sugar
  • 4 teaspoons baking powder
  • 1 teaspoon salt
  • 12 tablespoons unsalted butter at room temperature.
  • lemon zest of 2 lemons
  • * you can substitute these two ingredients of cake flour
  • Cream for 1 (2 layer ) cake:
  • 1 1/2 cups heavy whipping cream
  • 8 oz. cream cheese
  • 1 1/4 cup powdered sugar
  • 1 tablespoon squeezed lemon juice
  • 1-2 tablespoons limoncello liqueur
  • zest from one lemon
  • Syrup:
  • 1/2 cup hot water
  • 3 tablespoons sugar
  • 3 tablespoons limoncello
  • 2 tablespoons lemon juice.
  • -Combine all ingredients and let cool.
  • Fresh blueberries,raspberries or strawberries.
  • Whole or pureed with some sugar.

Instructions

  1. Direction for cake-
  2. Preheat oven to 350 degrees
  3. Sift flour with cornstarch 3 times and set aside
  4. In a large measuring cup,whisk together the milk,egg whites,lemon zest and vanilla.
  5. In the bowl of a standing mixer fitted with the paddle attachment,mix together the flour,sugar,baking powder and salt at med-low speed.
  6. With the mixer running,add the butter pieces one at a time until the mixture resembles fine,even crumbs.
  7. Stop the mixer and about 1/2 cup of the wet ingredients.
  8. Beat the batter at medium speed until it is pale and fluffy,about 1 1/2minutes.
  9. With the mixer running on med-low pour in the rest of the wet ingredients,then crank the speed back up to medium and beat for 30 seconds more.Scrape down the bowl and beat for 30 more seconds.
  10. Divide the batter equally among the two (9 inch) cake pans and smooth the tops.
  11. Bake for 23-25 minutes,or until a toothpick come out clean-do not over bake.
  12. Let the cakes cool in pans for 10 minutes,then remove the cakes from pans,and cool completely.
  13. Cream-
  14. In a mixer with whisk attachment ,whip cream cheese with powdered sugar.
  15. Scrape the bowl and add lemon juice,zest, and limoncello.Whip again until ingredients are well incorporated.
  16. On med-low speed gradually pour heavy whipping cream,bringing the speed higher gradually.
  17. Whip the cream until stiff peaks.
  18. Assembling-
  19. Pierce first cake layer with toothpick or fork.
  20. Pour/spray syrup on the cake.
  21. Spread a good amount of frosting.
  22. Arrange preferred berries on top of frosting.
  23. Place the other cake on top of berries.
  24. Pierce the cake and pour/spray syrup.
  25. Spread frosting all over cake and decorate as desired.
Schema/Recipe SEO Data Markup by ZipList Recipe Plugin
http://delightsofculinaria.com/lemon-layer-cake/


Breakfast Egg Sandwich with Pesto

breakfast sandwich
image_print

breakfast sandwich

Breakfast is my favorite meal of the day. I love breakfast!!! I don’t really care about other meals as much as breakfast. This is a tasty ultimate breakfast egg sandwich dressed up with flavorful pesto sauce.Mmmm… so delicious and just perfect!

Ingredients-

(As many as needed)

Bread of your choice ( I used bread tortas from costco)

Turkey,ham,or bologna slices

Havarti cheese slices

Tomato sliced

Avocado sliced

pesto sauce

Eggs


Direction-

Heat oven to 450 degrees.

Slice bread in half.

Spread a desired amount of pesto sauce on one side of the bread.

Place sliced turkey,ham, or bologna on top,followed by cheese and tomatoes.

Place both pieces of bread on to a lined baking sheet with parchment paper.

Toast for about 3-5 minutes or until the bread is well toasted and cheese is melted.

Meanwhile,fry eggs any way you prefer.You can make them sunny side up,scrambled, or simple folded omelet.

Take sandwiches from the oven.

Add avocado on top of tomatoes and place egg on top of tomatoes.

Place the top bread over eggs.

ENJOY!

egg sandwich

Breakfast egg sandwich with pesto

Breakfast egg sandwich with pesto

Ingredients

  • (As many as needed)
  • Bread of your choice ( I used bread tortas from costco)
  • Turkey,ham,or bologna slices
  • Havarti cheese slices
  • Tomato sliced
  • Avocado sliced
  • pesto sauce
  • Eggs

Instructions

  1. Heat oven to 450 degrees.
  2. Slice bread in half.
  3. Spread a desired amount of pesto sauce on one side of the bread.
  4. Place sliced turkey,ham, or bologna on top,followed by cheese and tomatoes.
  5. Place both pieces of bread on to a lined baking sheet with parchment paper.
  6. Toast for about 3-5 minutes or until the bread is well toasted and cheese is melted.
  7. Meanwhile,fry eggs any way you prefer.You can make them sunny side up,scrambled, or simple folded omelet.
  8. Take sandwiches from the oven.
  9. Add avocado on top of tomatoes and place egg on top of tomatoes.
  10. Place the top bread over eggs.
  11. ENJOY!
Schema/Recipe SEO Data Markup by ZipList Recipe Plugin
http://delightsofculinaria.com/breakfast-egg-sandwich-pesto/


Fresh Pasta with Alfredo Sauce

alfredo
image_print

alfredo

Nothing beats homemade pasta,believe me – not even fresh store bought.Making fresh pasta dough and alfredo sauce from scratch is easier then you might think.The taste of fresh pasta is incomparable and amazing! You can use this dough recipe for any type of pasta dishes including lasagna and chicken noodle soup. You can use any pasta maker (I’m using kitchen aid ) or do it all by hand. Here’s a great step by step tutorial from Olgas flavor factory.This recipe needs a lot of egg yolks, so if you’re baking something like meringue,macaroons or anything else; you can use egg yolks to make pasta for your next dinner.

Alfredo is an italian pasta dish.And if you visit Italy and order Alfredo at a restaurant you might be surprised to see your dish prepared differently then you expected.In Italy Alfredo is considered to be made of lots and lots of butter and lots and lots of parmesan cheese.No cream at all.Thats what happened to me when we visited Italy.I was surprised and thought they got my order wrong.Alfredo we know in US is different. Pasta is drowned in rich creamy buttery cream sauce  and usually with prawns,shrimps or chicken. It’s our Americanized Alfredo.

Pasta with alfredo sauce is very versatile. You can use any type of pasta from wide egg noodles to thin angel hair. To make it more festive,add sautéed prawns or shrimps to the sauce.Grilled,baked, or pan fried chicken breast.You can also add variety of vegetables like sauteed mushrooms,steamed broccoli,or sautéed,grilled or broiled tomatoes.


Ingredients for basic pasta dough-

6 egg yolks

1 egg

1/2 teaspoon salt

3 1/2 cup all purpose flour sifted

1/2 cup water

Basic Alfredo sauce-

3 cups heavy whipping cream

12 tablespoons (1 1/2 stick) butter sliced

1 1/2 cup fresh ground or grated parmesan cheese (Very good one)

1/2 teaspoon fresh grated nutmeg

Fresh ground white or black pepper.(I love extra)

4 garlic cloves crushed or minced

minced fresh parsley or basil

Salt to taste

Other optional ingredients-

If you love lemony taste add 1/4 cup lemon juice to heavy cream and lemon zest from 1 lemon.

Make sure not to boil  the sauce if adding lemon juice or it will curdle.

Hot pepper flakes.

Any Other desired ingredients mentioned above.


Directions for pasta-

Place egg,egg yolks,water and salt in mixer bowl.

Attach bowl and flat beater.

Turn to speed 2 or 3 and mix 30 seconds.

Exchange flat beater to dough hook.

Turn to speed 3 and knead approximately 2 minutes.

Remove dough from bowl and hand knead for another 2 minutes.

The dough should be hard, not soft.

Let dough rest covered for 20 minutes.

Divide dough into 4 equal pieces before processing with pasta sheet roller attachment.

Roll out dough in to sheets using kitchen aid attachment. Starting on 1 setting, then 3,5,and 8.

Sprinkle flour on both sides of the pasta sheet.

Cut into desired length.Repeat the steps with the rest of the dough.

Remove Pasta sheets roller attachment and  replace with fettuccinne pasta attachment.

Pass pasta sheets through the roller.

Cook right away or arrange on a lined table to dry.


Fettuccine and Alfredo Sauce-

Cook the pasta(about 18 oz.) in a large pot of boiling salted water and 1 tablespoon olive oil until tender but still firm to the bite, stirring occasionally.Drain.

Pour heavy whipping cream into a  heavy large skillet or a sauté pan.

Add the butter and cook over medium heat just until the butter melts, stirring occasionally.

Add garlic*,salt,pepper,nutmeg (lemon zest;optional) and cheese.

Stir to combine.

Add drained pasta  and mix well to coat with cream.

Cover with lid and let pasta sauce thicken and fettucine to absorb sauce.

Garnish with minced parsley or basil,more cheese and fresh ground pepper.


* If you like more mild garlic taste,sauté garlic with little olive oil before adding cream.

Basic Pasta dough and Alfredo Sauce

Ingredients

  • 6 egg yolks
  • 1 egg
  • 1/2 teaspoon salt
  • 3 1/2 cup all purpose flour sifted
  • 1/2 cup water
  • Basic Alfredo sauce-
  • 3 cups heavy whipping cream
  • 12 tablespoons (1 1/2 stick) butter sliced
  • 1 1/2 cup fresh ground or grated parmesan cheese (Very good one)
  • 1/2 teaspoon fresh grated nutmeg
  • Fresh ground white or black pepper.(I love extra)
  • 4 garlic cloves crushed or minced
  • minced fresh parsley or basil
  • Salt to taste
  • Other optional ingredients-
  • If you love lemony taste add 1/4 cup lemon juice to heavy cream and lemon zest from 1 lemon.
  • Make sure not to boil the sauce if adding lemon juice or it will curdle.
  • Hot pepper flakes.
  • Any Other desired ingredients mentioned above.

Instructions

  1. Directions for pasta dough-
  2. Place egg,egg yolks,water and salt in mixer bowl.
  3. Attach bowl and flat beater.
  4. Turn to speed 2 or 3 and mix 30 seconds.
  5. Exchange flat beater to dough hook.
  6. Turn to speed 3 and knead approximately 2 minutes.
  7. Remove dough from bowl and hand knead for another 2 minutes.
  8. Let dough rest covered for 20 minutes.
  9. Divide dough into 4 equal pieces before processing with pasta sheet roller attachment.
  10. Roll out dough in to sheets using kitchen aid attachment. Starting on 1 setting, then 3,5,and 8.
  11. Sprinkle flour on both sides of the pasta sheet.
  12. Cut into desired length.Repeat the steps with the rest of the dough.
  13. Remove Pasta sheets roller attachment and replace with fettucinne pasta attachment.
  14. Pass pasta sheets through the roller.
  15. Cook right away or arrange on a lined table to dry.
  16. Alfredo Sauce-
  17. Cook the pasta in a large pot of boiling salted water and 1 tablespoon olive oil until tender but still firm to the bite, stirring occasionally.Drain.
  18. Pour heavy whipping cream into a heavy large skillet or a sauté pan.
  19. Add the butter and cook over medium heat just until the butter melts, stirring occasionally.
  20. Add garlic*,salt,pepper,nutmeg (lemon zest;optional) and cheese.
  21. Stir to combine.
  22. Add drained pasta and mix well to coat with cream.
  23. Cover with lid and let pasta sauce thicken and fettucine to absorb sauce.
  24. Garnish with minced parsley or basil,more cheese and fresh ground pepper.
  25. * If you like more mild garlic taste,sauté garlic with little olive oil before adding cream.
Schema/Recipe SEO Data Markup by ZipList Recipe Plugin
http://delightsofculinaria.com/fresh-pasta-alfredo-sauce/


Russian Glazed Cookies “Pryaniki”

pryaniki
image_print

 pryaniki

“Pryaniki”are Russian Glazed cookies that existed since 9th century.Although, there are many types of pryaniki,this is just one of them.They are soft,delicious and will stay fresh not only for one day. Especially kids love them and it’s a great treat to share some with your coworkers,friends or family.If you like spiced cookies you can add cinnamon,nutmeg,all spice, or cardamom to the dough mixture.

Ingredients-

2 large egg yolks

2 cups sugar

2 cups sour cream (16oz)

8 tablespoons(1 stick) butter room temp.

1 teaspoon baking soda

1 teaspoon Baker’s Ammonia or Ammonia Bicarbonate*

1 tablespoon vinegar

4 -4 1/2 cups flour (I used canadian)**

1 tablespoon peppermint,vanilla,or almond extract (optional)

*If you can’t find it, sub in baking powder.

** I did experiment with canadian whole wheat flour it work great.Spelt and whole wheat pastry flour will work too.

Glaze-

2 cups powdered sugar

2 large egg whites

1 teaspoon peppermint extract(optional)

Direction-

1.Whisk  egg yolks with sugar.

2.Add  butter and sour cream and mix using a stand or hand mixer.

3.In a small bowl combine baking soda and ammonium(or baking powder) with vinegar. Add to the mixture.

4.Add preferred flavoring  if desired.

5.Gradually add flour and mix until well combined.

6.The dough will be sticky.Cover with plastic wrap.

7.Refrigerate for 2 hours.

8.Heat oven to 350 degrees.

9.Apply oil to your hands.

10.Roll dough into 1 inch balls and arrange them on a lined baking sheet.

11. Bake for 15-17 minutes.

Glaze-

12.Beat egg whites with powdered sugar and peppermint extract(if desired)

13.Apply glaze to pryaniki while still hot/warm.You can dip or mix them into to glaze also,then spread glaze evenly using your fingers.

14.Arrange on a wax paper to dry.

15.Enjoy with your favorite tea.


Russian Glazed Cookies “Pryaniki”

Ingredients

  • 2 large egg yolks
  • 2 cups sugar
  • 2 cups sour cream (16oz)
  • 8 tablespoons(1 stick) butter room temp.
  • 1 teaspoon baking soda
  • 1 teaspoon Baker's Ammonia or Ammonia Bicarbonate*
  • 1 tablespoon vinegar
  • 4 -4 1/2 cups flour (I used canadian)**
  • 1 tablespoon peppermint,vanilla,or almond extract (optional)
  • *If you can't find it, sub in baking powder.
  • ** I did experiment with canadian whole wheat flour it work great.Spelt and whole wheat pastry flour will work too.
  • Glaze-
  • 2 cups powdered sugar
  • 2 large egg whites
  • 1 teaspoon peppermint extract(optional)

Instructions

  1. 1.Whisk egg yolks with sugar.
  2. 2.Add butter and sour cream and mix using a stand or hand mixer.
  3. 3.In a small bowl combine baking soda and ammonium(or baking powder) with vinegar. Add to the mixture.
  4. 4.Add preferred flavoring if desired.
  5. 5.Gradually add flour and mix until well combined.
  6. 6.The dough will be sticky.Cover with plastic wrap.
  7. 7.Refrigerate for 2 hours.
  8. 8.Heat oven to 350 degrees.
  9. 9.Apply oil to your hands.
  10. 10.Roll dough into 1 inch balls and arrange them on a lined baking sheet.
  11. 11. Bake for 15-17 minutes.
  12. Glaze-
  13. 12.Beat egg whites with powdered sugar and peppermint extract(if desired)
  14. 13.Apply glaze to pryaniki while still hot/warm.You can dip or mix them into to glaze also,then spread glaze evenly using your fingers.
  15. 14.Arrange on a wax paper to dry.
  16. 15.Enjoy with your favorite tea.
Schema/Recipe SEO Data Markup by ZipList Recipe Plugin
http://delightsofculinaria.com/russian-glazed-cookies-pryaniki/

Lazy Vareniki

Lazy Vareniki
image_print

Lazy Vareniki

Well known and all time favorite Ukrainian breakfast dish.Lazy vareniki is like traditional cheese filled vareniki but simplified by combining all ingredients together in a bowl.It’s made of quick dough, cut into small pieces and cooked in boiling water.Tossed with lots of butter and served with sour cream.If desired,you can make simple sour cherry *sauce (sooo good) or strawberry sauce and pour it over vareniki.

*I found frozen sour cherries at my local European/Russian store.

2 cups farmers cheese(tvorog)*

2 eggs

1/2 cup sugar

1/2 teaspoon salt

1  1/2 cups flour

6 tablespoons butter melted (for serving

sour cream (serving)

Sugar (serving)

Large pot and water for boiling

You can substitute ricotta cheese or cottage cheese,but you will need to adjust flour.

Sour cherry sauce-

1 cup frozen sour cherries

1/4 -1/2 cup sugar (sweetness to your liking)

1 tablespoon corn starch


Strawberry sauce-

Strawberries

sugar

Direction-

1.Combine tvorog,eggs,sugar,salt in a bowl using stand mixer,spoon, or fork.

2.Add flour and mix to combine.If dough is too sticky,add flour 1 tablespoon at a time. It should be soft,not tough.

3.Divide dough into four sections.

DSC_5322

4.On a well floured surface, roll a long rope/snake.*

5.Cut the rope into 1/2 inch pieces.

6. Bring water to boil and add 1/2 teaspoon of salt.

7.Throw in vareniki one by one.(don’t over crowd ,cook in batches if needed)

8.When vareniki begin to float on top,cook for 3-4 minutes.

9. Drain the water.Transfer to a mixing bowl and toss with melted butter and sugar.

Serve with sour cream and/or with desired sauce (below).

*If you want to be lazier then lazy….use a teaspoon to drop the dough in the water.

Sour cherry sauce-

Place cherries and sugar in a small sauce pan.

When sugar has melted,and begins to simmer, take 3 tablespoons of juice from the sauce pan to a cup.

Add cornstarch to the cup with sour cherry juice.Mix well.

Stir in cornstarch mixture with sour cherries and cook until liquid thickens a little.

lazy vareniki


Strawberry sauce-

Slice strawberries.

Combine strawberries with sugar in a small sauce pan.

Cook stirring until sugar is dissolved (try not to overcook).


To reheat;melt a little bit of  butter in a pan.Throw in cooked vareniki.Saute until golden in color.

Lazy Vareniki


Lazy Vareniki

Lazy Vareniki

Ingredients

  • 2 cups farmers cheese(tvorog)
  • 2 eggs
  • 1/2 cup sugar
  • 1/2 teaspoon salt
  • 1 1/2 cups flour
  • 6 tablespoons butter melted (for serving
  • sour cream (serving)
  • Sugar (serving)
  • Large pot and water for boiling
  • Sour cherry sauce-
  • 1 cup frozen sour cherries
  • 1/4 -1/2 cup sugar (sweetness to your liking)
  • 1 tablespoon corn starch
  • Strawberry sauce-
  • Strawberries
  • sugar

Instructions

  1. Direction-
  2. 1.Combine tvorog,eggs,sugar,salt in a bowl using stand mixer,spoon, or fork.
  3. 2.Add flour and mix to combine.If dough is too sticky,add flour 1 tablespoon at a time. It should be soft,not tough.
  4. 3.Divide dough into four sections.
  5. 4.On a well floured surface, roll a long rope/snake.
  6. 5.Cut the rope into 1/2 inch pieces.
  7. 6. Bring water to boil and add 1/2 teaspoon of salt.
  8. 7.Throw in vareniki one by one.(don't over crowd ,cook in batches if needed)
  9. 8.When vareniki begin to float on top,cook for 3-4 minutes.
  10. 9. Drain the water.Transfer to a mixing bowl and toss with melted butter and sugar.
  11. Serve with sour cream and/or with desired sauce (below).
  12. 1.Sour cherry sauce-
  13. 2.Place cherries and sugar in a small sauce pan.
  14. 3.When sugar has melted,and begins to simmer, take 3 tablespoons of juice from the sauce pan to a cup.
  15. 4.Add cornstarch to the cup with sour cherry juice.Mix well.
  16. Stir in cornstarch mixture with sour cherries and cook until liquid thickens a little.
  17. Strawberry sauce-
  18. 1.Slice strawberries.
  19. 2.Combine strawberries with sugar in a small sauce pan.
  20. 3.Cook stirring until sugar is dissolved (try not to overcook).
  21. To reheat;melt a little bit of butter in a pan.Throw in cooked vareniki.Saute until golden in color.
Schema/Recipe SEO Data Markup by ZipList Recipe Plugin
http://delightsofculinaria.com/lazy-vareniki/

Mushroom quiche

mushroom quiche
image_print

mushroom quiche

This Mushroom quiche is rich,delicate and perfect for fancy breakfast or brunch.Crispy buttery crust filled with savory creamy custard and sautéed mushrooms.

It’s not hard to make it , but is a little time consuming. You can save some time and buy ready-made pie shell,but of course it’s not going to be buttery,flaky, and delicate as homemade.Because it’s time consuming;I make it day before serving, so all  do in the morning is reheat and serve.

By pre baking the shell,your crust will be crisper and not soggy.

Crust-

Adapted from America’s Test Kitchen

1 3/4 cups all-purpose flour *

1/2 teaspoon salt

12 tablespoons  chilled unsalted butter,cut into 1/2-inch pieces

3 tablespoons sour cream

1/3 cup ice water

1 large egg white,lightly beaten.

dry beans

foil or parchment paper

* I used spelt flour,worked well.(pictured above)

Filling-

2 shallots finely chopped.

8 oz.. mushrooms ( any type) sliced ( you can add more if you really love mushrooms)

1/4 cup white wine (optional)

2 tablespoons butter

1/4 teaspoon salt

1/4 fresh ground black pepper

pinch of nutmeg

7 eggs, lightly beaten

4 cups half-half or milk (or 2 cups heavy whipping cream + 2 cups milk)

1/2 cup -3/4 cup grated Gruyere or Swiss cheese.


Directions-

Crust:

1.Process flour and salt in food processor until combined.About 3 seconds.

Add butter and pulse until butter is size of large peas,about 10 pulses.

2.Combine sour cream and water in a small bowl.

Add half of the mixture to flour mixture; pulse 3 times.

Repeat with the remaining sour cream mixture.

Pinch dough with fingers;if dough is floury,dry,does not hold together,add 1-2 tablespoons more ice water and pulse until dough forms large clumps and no dry flour remains,3-5 pulses.

3.Turn dough out onto counter and flatten into 6-inch disk;wrap disk in plastic wrap and refrigerate until firm but not hard,1-2 hours before rolling.(dough can be refrigerated for 24 hours;let stand at room temperature for 15 minutes before rolling).

4.Grease a pie dish, quiche pan or any other deep cake pan.

Roll out the dough on generously floured counter to 15 -inch circle about 1/4 inch thick.

Roll dough loosely around rolling pin and unroll into prepared pan.Working around circumference,ease dough into pan by gently lifting edge of dough with 1 hand while pressing into pan with other.

Trim any dough that extends more than 1 inch over edge of pan.Patch any cracks or holes with dough scraps as needed.

Refrigerate any remaining dough scraps or make apple pie.

Refrigerate dough lined pan for 20-30 minutes.

5.Heat Oven to 375 degrees.

Line dough with parchment paper or foil and fill completely with dry beans or pie weights, including corners of the shell.

Bake for 15-20 minutes.Remove beans,paper or foil from the crust.

Filling-

Reduce oven to 325 degrees.

In a saute pan, melt butter and throw in mushrooms and shallots.

Saute until liquid is evaporated.

Add white wine (if preferred) and let it evaporate about 1 minute.

Combine eggs,milk,half-half or cream with milk,nutmeg,salt and black pepper using a whisk,blender,or stand mixer.

Stir in mushroom mixture.

Sprinkle half of the grated cheese on the bottom of the pastry shell.

Pour custard mixture with mushrooms into pastry shell.

Sprinkle the remaining grated cheese on top of the custard.

Place dish on a baking sheet ,and bake for about 1 :15 -1:30 minutes or until custard is puffed and browned.

Serve warm or cooled.

Or place it in the fridge when cooled and serve next day (cold or warmed up)

Mushroom quiche

Ingredients

  • Crust-
  • Adapted from America's Test Kitchen
  • 1 3/4 cups all-purpose flour *
  • 1/2 teaspoon salt
  • 12 tablespoons chilled unsalted butter,cut into 1/2-inch pieces
  • 3 tablespoons sour cream
  • 1/3 cup ice water
  • 1 large egg white,lightly beaten.
  • dry beans
  • foil or parchment paper
  • * I used spelt flour,worked well.(pictured above)
  • Filling-
  • 2 shallots finely chopped.
  • 8 oz.. mushrooms ( any type) sliced ( you can add more if you really love mushrooms)
  • 1/4 cup white wine (optional)
  • 2 tablespoons butter
  • 1/4 teaspoon salt
  • 1/4 fresh ground black pepper
  • pinch of nutmeg
  • 7 eggs, lightly beaten
  • 4 cups half-half or milk (or 2 cups heavy whipping cream + 2 cups milk)
  • 1/2 cup -3/4 cup grated Gruyere or Swiss cheese.

Instructions

  1. Directions-
  2. Crust:
  3. 1.Process flour and salt in food processor until combined.About 3 seconds.
  4. Add butter and pulse until butter is size of large peas,about 10 pulses.
  5. 2.Combine sour cream and water in a small bowl.
  6. Add half of the mixture to flour mixture; pulse 3 times.
  7. Repeat with the remaining sour cream mixture.
  8. Pinch dough with fingers;if dough is floury,dry,does not hold together,add 1-2 tablespoons more ice water and pulse until dough forms large clumps and no dry flour remains,3-5 pulses.
  9. 3.Turn dough out onto counter and flatten into 6-inch disk;wrap disk in plastic wrap and refrigerate until firm but not hard,1-2 hours before rolling.(dough can be refrigerated for 24 hours;let stand at room temperature for 15 minutes before rolling).
  10. 4.Grease a pie dish, quiche pan or any other deep cake pan.
  11. Roll out the dough on generously floured counter to 15 -inch circle about 1/4 inch thick.
  12. Roll dough loosely around rolling pin and unroll into prepared pan.Working around circumference,ease dough into pan by gently lifting edge of dough with 1 hand while pressing into pan with other.
  13. Trim any dough that extends more than 1 inch over edge of pan.Patch any cracks or holes with dough scraps as needed.
  14. Refrigerate any remaining dough scraps or make apple pie ;) .
  15. Refrigerate dough lined pan for 20-30 minutes.
  16. Heat Oven to 375 degrees.
  17. Line dough with parchment paper or foil and fill completely with dry beans or pie weights, including corners of the shell.
  18. Bake for 15-20 minutes.Remove beans,paper or foil from the crust.
  19. Filling-
  20. Reduce oven to 325 degrees.
  21. In a saute pan, melt butter and throw in mushrooms and shallots.
  22. Saute until liquid is evaporated.
  23. Add white wine (if preferred) and let it evaporate about 1 minute.
  24. Combine eggs,milk,half-half or cream with milk,nutmeg,salt and black pepper using a whisk,blender,or stand mixer.
  25. Stir in mushroom mixture.
  26. Sprinkle half of the grated cheese on the bottom of the pastry shell.
  27. Pour custard mixture with mushrooms into pastry shell.
  28. Sprinkle the remaining grated cheese on top of the custard.
  29. Place dish on a baking sheet ,and bake for about 1 :15 -1:30 minutes or until custard is puffed and browned.
  30. Serve warm or cooled.
  31. Or place it in the fridge when cooled and serve next day (cold or warmed up)
Schema/Recipe SEO Data Markup by ZipList Recipe Plugin
http://delightsofculinaria.com/mushroom-quiche/

Fried Calamari with Sweet Chili Sauce

calamari
image_print

calamari

This is a copy cat recipe from Ruth’s Chris steakhouse restaurant.We love it so much that I decided to recreate this appetizer dish.Their fried calamari with sweet chili sauce are AMAZING and addicting! They are dredged in seasoned flour coating, fried until browned and crispy, then tossed with sweet chili sauce and diced roasted red peppers.


Ingredients-

1 pound cleaned and pat dry squid with tentacles, bodies cut into 1/2-inch-thick rings

1 cup all-purpose flour

1 1/2 teaspoon old bay seasoning

1 teaspoon black pepper

salt

1 red bell pepper

1/4 cup Sweet chili sauce(add more if you like it to be saucy)*

1/2 lemon squeezed

minced parsley or chopped green onion/chives

High heat oil

* I bought the sauce at Trader Joe’s,or you can make your own by this recipe.
calamari


Directions-

Heat oven to 500 degrees on broil.

Place bell pepper on a baking sheet.

Broil until charred,turning sides 3 times.

Remove from oven and place it inside the plastic bag or ziplock bag.

Set aside and let them cool enough to handle.

When peppers are ready to handle,peel off the skin.

Cut peppers in to 1/2 inch squares.Set a side.

calamari


Pour enough oil in to a dutch oven or a sauce pan (about 2-3 inches from the bottom)

Heat oil over medium-high heat to 350 degrees.

In a bowl,combine flour,old bay seasoning, and black pepper.

In small handfuls,dredge the squid in the flour mixture and shake off excess.

Gently lower the squid in hot oil. Fry in batches for about 3 minutes or until lightly golden in color.

Remove from oil and sprinkle salt.


In a small sauce pan, heat sweet chili sauce with squeezed lemon juice.

Toss Calamari with sauce and roasted bell peppers.

Transfer to a serving platter and sprinkle with minced parsley and/or chives/green onions.

Squeeze more lemon  on top if desired.


Fried Calamari with Sweet Chili Sauce

Ingredients

  • 1 pound cleaned and pat dry squid with tentacles, bodies cut into 1/2-inch-thick rings
  • 1 cup all-purpose flour
  • 1 1/2 teaspoon old bay seasoning
  • 1 teaspoon black pepper
  • salt
  • 1 red bell pepper
  • 1/4 cup Sweet chili sauce(add more if you like it to be saucy)*
  • 1/2 lemon squeezed
  • minced parsley or chopped green onion/chives
  • High heat oil
  • * I bought the sauce at Trader Joe's,or you can make your own by this recipe.

Instructions

  1. Heat oven to 500 degrees on broil.
  2. Place bell pepper on a baking sheet.
  3. Broil until charred,turning sides 3 times.
  4. Remove from oven and place it inside the plastic bag or ziplock bag.
  5. Set aside and let them cool enough to handle.
  6. When peppers are ready to handle,peel off the skin.
  7. Cut peppers in to 1/2 inch squares.Set a side.
  8. Pour enough oil in to a dutch oven or a sauce pan (about 2-3 inches from the bottom)
  9. Heat oil over medium-high heat to 350 degrees.
  10. In a bowl,combine flour,old bay seasoning, and black pepper.
  11. In small handfuls,dredge the squid in the flour mixture and shake off excess.
  12. gently lower the squid in hot oil. Fry in batches for about 3 minutes or until lightly golden in color.
  13. remove from oil and sprinkle salt.
  14. In a small sauce pan, heat sweet chili sauce with squeezed lemon juice.
  15. Toss Calamari with sauce and roasted bell peppers.
  16. Transfer to a serving platter and sprinkle with minced parsley and/or chives/green onions.
  17. Squeeze more lemon on top if desired.
Schema/Recipe SEO Data Markup by ZipList Recipe Plugin
http://delightsofculinaria.com/fried-calamari-sweet-chili-sauce/


Chicken Nuggets

chicken nuggets
image_print

chicken nuggets

What kid doesn’t like chicken nuggets?  They are really popular and on the restaurants menu most of the time. Kids just love them!

I stopped buying frozen chicken nuggets about three years ago,and tried making homemade ones with different recipes.And… this recipe is a keeper for me. They are perfect and just the way kids like it. And its so funny how they tried to compare them to  some of the restaurants and fast food places like chick-fil-a. But,guess what…? They liked these better !

They are surprisingly easy to make and not a lot of ingredients.Less ingredients then store bought box for sure.And all the ingredients will not sound foreign to  you. My sister Olga shared this recipe with me from  weelicious.com * .They are delicious and your family,especially kids will love them.

chicken nuggets


(dipped in to ketchup by tiny hands)


– I made few adjustments to the recipe.

Ingredients-

about 24 nuggets

1 pound chicken breast,cut into chunks.

1/4 cup mashed potatoes or rolled old fashion oats (5 minute oats.)*

1/2 teaspoon garlic salt with parsley

1/4 teaspoon onion powder

1 tablespoon mayonnaise(optional but recommended)

1 tablespoon parmessan cheese,grated

panko bread crumbs

oil

1/4 teaspoon salt +/-

black pepper

* I used mashed potatoes

Direction-

Preheat oven to 375° F.

Place chicken breasts in a food processor until chicken is finely chopped.

Transfer chicken to a bowl and add garlic salt,onion powder,parmesan cheese,mashed potatoes/oats,salt and pepper.

Mix well to combine all the ingredients.

Pour oil in to a small dish.

With moistened hands,roll 1 tablespoon of chicken mixture in to a ball and flatten to a “nugget” shape.

Dip nugget into oil,and coat with panko crumbs.

Arrange on to a lined baking sheet with parchment paper.

Bake for 15 minutes.Broil on 500 for 2-3 minutes or until nuggets are golden brown.

*  To freeze, place nuggets on a sheet tray after this step and freeze for one hour. Place nuggets in labeled freezer bags for up to 3 months.

You can serve them with ketchup or honey mustard sauce.

Honey mustard sauce-

2 tablespoon mayonnaise

1 tablespoon dijon mustard (good one)

1 teaspoon red/white wine vinegar

1 tablespoon honey

Whisk all the ingredients.

Chicken Nuggets

Ingredients

  • about 24 nuggets
  • 1 pound chicken breast,cut into chunks.
  • 1/4 cup mashed potatoes or rolled old fashion oats (5 minute oats.)*
  • 1/2 teaspoon garlic salt with parsley
  • 1/4 teaspoon onion powder
  • 1 tablespoon mayonnaise(optional)
  • 1 tablespoon parmessan cheese,grated
  • panko bread crumbs
  • oil
  • 1/4 teaspoon salt +/-
  • black pepper
  • * I used mashed potatoes
  • Honey mustard sauce-
  • 2 tablespoon mayonnaise
  • 1 tablespoon dijon mustard (good one)
  • 1 teaspoon red/white wine vinegar
  • 1 tablespoon honey
  • Whisk all the ingredients.

Instructions

  1. Preheat oven to 375° F.
  2. Place chicken breasts in a food processor until chicken is finely chopped.
  3. Transfer chicken to a bowl and add garlic salt,onion powder,parmesan cheese,mashed potatoes/oats,salt and pepper.
  4. Mix well to combine all the ingredients.
  5. Pour oil in to a small dish.
  6. With moistened hands,roll 1 tablespoon of chicken mixture in to a ball and flatten to a "nugget" shape.
  7. Dip nugget into oil,and coat with panko crumbs.
  8. Arrange on to a lined baking sheet with parchment paper.
  9. Bake for 15 minutes.Broil on 500 for 2-3 minutes or until nuggets are golden brown.
  10. * To freeze, place nuggets on a sheet tray after this step and freeze for one hour. Place nuggets in labeled freezer bags for up to 3 months.
Schema/Recipe SEO Data Markup by ZipList Recipe Plugin
http://delightsofculinaria.com/chicken-nuggets/

Korean Carrot Salad

korean carrot salad
image_print


korean carrot salad

Well flavored,slightly spicy, and vibrant Korean carrot salad.This salad was popularized  by ethnic Koreans all over Russia,Ukraine,and Central Asia.It always been a staple salad at all Slavic weddings,parties,and holidays.

This recipe came from my mother who was selling this salad along with Kim Chi salad at a local farmers market back in Tajikistan.Korean ladies tought her how to make it the authentic way. Adding sugar is optional. My mom doesn’t add sugar.

Ingredients:

8 carrots peeled

1/2 onion

1/2 carrot sliced in half

1 cup oil *

2 tbs white sugar (optional)

1 tbs salt or +/- to taste

6-8  cloves garlic crushed

1 teaspoon ground or coarsly ground coriander seeds.

1/4 cup white vinegar

1 dry red chili pepper

1 teaspoon black pepper

red chili pepper flakes or cayenne pepper (optional)

Chopped fresh cilantro (optional)


* Use non flavored oil such as canola,vegetable,corn,grape seed or light olive oil.

Directions-

Shred carrots using a thin julienne slicer.

Add salt and sugar. Mix well using your hands .

Pour oil in to a small pan (preferably deep one).

Place chili pepper,sliced carrot and onion in the oil ( sliced side down).

Heat it well on medium-high heat until 1/4 of  onion is black and the oil is boiling *

Meanwhile,add garlic,vinegar,black pepper,coriander,and hot peppers (if you prefer your salad to be spicy) to carrots.

Carefully Pour hot oil allover carrots making sure to pour some over garlic.

Quickly and carefully remove and discard onion and chili pepper.

Mix with your hands.

Adjust seasonings if needed.

This salad has to be refrigerated at least 12 hours before serving.

Add fresh cilantro to the salad if desired.

Can be stored in a well covered container up to 10 days.

Korean Carrot Salad

Ingredients

  • 8 carrots peeled
  • 1/2 onion
  • 1/2 carrot sliced in half
  • 1 cup oil *
  • 2 tbs white sugar (optional)
  • 1 tbs salt or +/- to taste
  • 6-8 cloves garlic crushed
  • 1 teaspoon ground or coarsly ground coriander seeds.
  • 1/4 cup white vinegar
  • 1 dry red chili pepper
  • 1 teaspoon black pepper
  • red chili pepper flakes or cayenne pepper (optional)
  • Chopped fresh cilantro (optional)
  • * Use non flavored oil such as canola,vegetable,corn,grape seed or light olive oil.

Instructions

  1. Shred carrots using a thin julienne slicer.
  2. Add salt and sugar. Mix well using your hands .
  3. Pour oil in to a small pan (preferably deep one).
  4. Place chili pepper,sliced carrot and onion in the oil ( sliced side down).
  5. Heat it well on medium-high heat until 1/4 of onion is black and the oil is boiling *
  6. Meanwhile,add garlic,vinegar,black pepper,coriander,and hot peppers (if you prefer your salad to be spicy) to carrots.
  7. Carefully Pour hot oil allover carrots making sure to pour some over garlic.
  8. Quickly and carefully remove and discard onion and chili pepper.
  9. Mix with your hands.
  10. Adjust seasonings if needed.
  11. This salad has to be refrigerated at least 12 hours before serving.
  12. Add fresh cilantro to the salad if desired.
  13. Can be stored in a well covered container up to 10 days.
Schema/Recipe SEO Data Markup by ZipList Recipe Plugin
http://delightsofculinaria.com/korean-carrot-salad/

Cream horns -Трубочки

DSC_5117
image_print

DSC_5117

Treats like  cream horns (trubochki) filled with fluffy cream will always be a big hit on any type of party. And for us who grew up in slavic family they sure do bring a lot of childhood memories. I make dough from scratch for these,but you can use store-bought  puff pastry as well.

I made these for Christmas using cream recipe from leascooking.blogspot.com .I usually use different cream for these.But, I liked this one better.

Ingredients:

2 1/2 sticks frozen salted butter (300 grams)

2 1/2 cup all purpose flour

1/2 cup cold water

1 egg

1/4 cup vinegar

Cream:

2 cups heavy whipping cream

3/4 can sweetened condensed milk

1-2 teaspoons vanilla

Powdered sugar for dusting.

Direction:

In a large mixing bowl,Shred butter using a grater.

Add flour,and rub the flour with butter to make a crumb mixture.

In a separate small bowl,whisk water,vinegar, and egg.

Add water/egg/vinegar mixture to flour/butter.

Mix using hands few times. (Don’t over mix)

Divide dough in to 4-5 portions/balls.

Refrigerate for about 1 hour.

You will need cream horn molds to make these.

Heat oven to 350 degrees.

On well floured surface roll out dough.Not to thin,so you will be able to roll the dough around mold.

Cut into 1 inch strips.

Starting from the pointy top,wrap the strip around the mold overlapping half the width of the strip.

Lay them on the baking sheet and bake for 15-18 minutes or until slightly golden.


Cream:

Start by whipping heavy whipping cream.

Add 1 tbs at the time of sweet condensed milk.

Add vanilla.

Whip until it becomes thick.

Fill a pastry bag with cream and fill cream horns with it.

Dust with generous amount of powdered sugar.


Cream horns -Трубочки

Ingredients

  • 2 1/2 sticks frozen salted butter (300 grams)
  • 2 1/2 cup all purpose flour
  • 1/2 cup cold water
  • 1 egg
  • 1/4 cup vinegar
  • Cream:
  • 2 cups heavy whipping cream
  • 3/4 can sweetened condensed milk
  • 1-2 teaspoons vanilla
  • Powdered sugar for dusting.

Instructions

  1. In a large mixing bowl,Shred butter using a grater.
  2. Add flour,and rub the flour with butter to make a crumb mixture.
  3. In a separate small bowl,whisk water,vinegar, and egg.
  4. Add water/egg/vinegar mixture to flour/butter.
  5. Mix using hands few times. (Don't over mix)
  6. Divide dough in to 4-5 portions/balls.
  7. Refrigerate for about 1 hour.
  8. You will need cream horn molds to make these.
  9. Heat oven to 350 degrees.
  10. On well floured surface roll out dough.Not to thin,so you will be able to roll the dough around mold.
  11. Cut into 1 inch strips.
  12. Starting from the pointy top,wrap the strip around the mold overlapping half the width of the strip.
  13. Lay them on the baking sheet and bake for 15-18 minutes or until slightly golden.
  14. Cream:
  15. Start by whipping heavy whipping cream.
  16. Add 1 tbs at the time of sweet condensed milk.
  17. Add vanilla.
  18. Whip until it becomes thick.
  19. Fill a pastry bag with cream and fill cream horns with it.
  20. Dust with generous amount of powdered sugar.
Schema/Recipe SEO Data Markup by ZipList Recipe Plugin
http://delightsofculinaria.com/cream-horns-%d1%82%d1%80%d1%83%d0%b1%d0%be%d1%87%d0%ba%d0%b8/

Roasted Rack of Lamb

Roasted rack of lamb
image_print

Roasted rack of lamb

Roasted rack of lamb is a festive dish at holidays like Christmas, New Years and Easter.The meat is tender and juicy with a little herby crust.

Ingredients for 2 racks-

8 garlic cloves

1 tablespoons fresh thyme leaves

4 sprigs fresh rosemary leaves

1/4 cup olive oil

1/4 cup red wine

1 tablespoon dijon mustard

salt and fresh ground better ( I used about 1 tablespoon)

Direction:

Using a blender,combine all the ingredients.

Rub the marinade all over lamb racks.

Marinade for at least 8-12 hours in the fridge.Bring meat to room temperature before roasting.(about 1 1/2-2 hours)

Heat oven to 500 degrees on broil.

Line a baking sheet with foil.

Place racks on baking sheet and roast for  about 15 minutes.

Reduce heat 450 degrees on bake for another 15-20 minutes*

Remove from oven, let rest covered with foil for at least 5 minutes.

Carve and serve right away.

* If you prefer your meat more rare,roasting time will be less.


Roasted Rack of Lamb

Ingredients

  • 10 garlic cloves
  • 2 tablespoons fresh thyme leaves
  • 5 sprigs fresh rosemary leaves
  • 1/4 cup olive oil
  • 1/4 cup red wine
  • 1 tablespoon dijon mustard
  • salt and fresh ground better ( I used about 1 tablespoon)

Instructions

  1. Using a blender,combine all the ingredients.
  2. Rub the marinade all over lamb racks.
  3. Marinade for at least 8-12 hours in the fridge.Bring meat to room temperature before roasting.(about 1 1/2-2 hours)
  4. Heat oven to 500 degrees on broil.
  5. Line a baking sheet with foil.
  6. Place racks on baking sheet and roast for about 15 minutes.
  7. Reduce heat 450 degrees on bake for another 15-20 minutes*
  8. Remove from oven, let rest covered with foil for at least 5 minutes.
  9. Carve and serve right away.
  10. * If you prefer your meat more rare,roasting time will be less.
Schema/Recipe SEO Data Markup by ZipList Recipe Plugin
http://delightsofculinaria.com/roasted-rack-lamb/


Hazelnut Cake Truffles

Hazelnut Cake truffles
image_print

Hazelnut Cake truffles

Desserts or treats like truffles are always  special on holidays like Christmas, New years and Valentines.They are so adorable and decadent.These hazelnut cake truffles are a heavenly bite-size chocolate treats with a lightly crunchy and creamy soft cake inside.

Ingredients:

3 eggs

1 cup sugar

1 teaspoon baking soda

1 cup buttermilk

½ can condensed milk

2 tablespoons cocoa powder

2 cups flour

Directions for cake :

Preheat oven to 350 degrees

Using mixer beat together eggs and sugar until pale in color.

Add baking soda to buttermilk and mix it well.

Add buttermilk,cocoa and condensed milk  to egg mixture and mix on medium speed until well combined.

Add the flour and mix on low. Transfer the batter to a 9×13 greased baking pan and bake approximately 30-35 minutes depending on your oven.

Let cake cool completely.

Cream:

1 can dulce de leche (cooked condensed milk)

2 sticks butter at room temperature

2 tbsp cocoa powder

1/2 cup hazelnuts

1-2 tablespoons cognac or brandy (optional)

3 tbsp. nutella (optional)

Coating:

crushed Chocolate Waffles

melted chocolate or truffles

melted white chocolate

Cream directions:

Whip butter until pale and fluffy.

Add in dulce de leche and cocoa.

Whip all the ingredients until well combined.


Break/tear cake in to small pieces and place it in the mixing bowl.

Using a blender,crush hazelnuts.

Add cream and hazelnuts to the broken cake.

Mix/beat until all ingredients are well incorporated and creamed.

Form the cake mixture in to a 1 inch balls.

Cover the balls with your choice of coating.I used chocolate waffles from Trader Joes.


Hazelnut Cake Truffles

Ingredients

  • Cake:
  • 3 eggs
  • 1 cup sugar
  • 1 teaspoon baking soda
  • 1 cup buttermilk
  • ½ can condensed milk
  • 2 tablespoons cocoa powder
  • 2 cups flour
  • Cream:
  • 1 can dulce de leche (cooked condensed milk)
  • 2 sticks butter at room temperature
  • 2 tbsp cocoa powder
  • 1/2 cup hazelnuts
  • 1-2 tablespoons cognac or brandy (optional)
  • 3 tbsp. Nutella (optional)
  • Coating:
  • crushed Chocolate Waffles
  • melted chocolate or truffles
  • melted white chocolate

Instructions

  1. Directions for cake :
  2. Using mixer beat together eggs and sugar until pale in color.
  3. Add baking soda to buttermilk and mix it well.
  4. Add buttermilk,cocoa and condensed milk to egg mixture and mix on medium speed until well combined.
  5. Add the flour and mix on low. Transfer the batter to a 9x13 greased baking pan and bake approximately 30-35 minutes depending on your oven.
  6. Let cake cool completely.
  7. Cream directions:
  8. Whip butter until pale and fluffy.
  9. Add in dulce de leche and cocoa(cognac,Nutella).
  10. Whip all the ingredients until well combined.
  11. Break/tear cake in to small pieces and place it in the mixing bowl.
  12. Using a blender,crush hazelnuts.
  13. Add cream and hazelnuts to the broken cake.
  14. Mix/beat until all ingredients are well incorporated and creamed.
  15. Form the cake mixture in to a 1 inch balls.
  16. Cover the balls with your choice of coating.I used chocolate waffles from Trader Joes.
  17. Refrigerate.
Schema/Recipe SEO Data Markup by ZipList Recipe Plugin
http://delightsofculinaria.com/hazelnut-cake-truffles/

Eggplant Salad

Eggplant salad
image_print

Eggplant salad

Salads play major role in Russian and Ukrainian cuisine especially at holidays or any kind of celebration.At weddings tables are filled with delicious food and big variety of salads;Eggplant salad would be one of them.I love and adore Eggplant salads!

My mother in law is a wonderful cook with a heart full of love and care.She is also known as a praying woman. She always likes to surprise her grandchildren with goodies and tries to make something  special for her adult children. She shared this recipe with me and I would say that it’s my favorite eggplant salad so far.It’s healthy and surprisingly filling.This salad stores well for weeks in a jar or airtight container.

Marinade-

3 quarts tomato juice

2 cups oil

1 1/4 cup sugar

3-3 1/2 tablespoons salt

1/3 cup vinegar

Vegetables-

4-5 eggplants cut into short thick strip

3 red bell peppers

4 carrots peeled and thinly julienned

1 garlic head peeled and crushed

3/4 cup chopped parsley

1/2 cup chopped cilantro (optional)


Direction:

Combine marinade ingredients in a pot.Bring to boil.

In batches,add eggplant to marinade and cook for 12-14 minutes.

Place colander on top of a bowl and transfer cooked eggplants to colander .

Cook bell peppers for about 7-8 minutes.Transfer to colander.

Cook carrots 5-7 minutes and transfer to colander with the rest of the vegetables.

Transfer vegetables from colander to a another bowl.Add herbs,garlic,and 1 cup of the marinade.Mix well to combine all the ingredients.

Eggplant Salad

Ingredients

  • Marinade-
  • 3 quarts tomato juice
  • 2 cups oil
  • 1 1/4 cup sugar
  • 3-3 1/2 tablespoons salt
  • 1/3 cup vinegar
  • Vegetables-
  • 4-5 eggplants cut into short thick strip
  • 3 red bell peppers
  • 4 carrots peeled and thinly julienned
  • 1 garlic head peeled and crushed
  • 3/4 cup chopped parsley
  • 1/2 cup chopped cilantro (optional)

Instructions

  1. Direction:
  2. Combine marinade ingredients in a pot.Bring to boil.
  3. In batches,add eggplant to marinade and cook for 12-14 minutes.
  4. Place colander on top of a bowl and transfer cooked eggplants to colander .
  5. Cook bell peppers for about 7-8 minutes.Transfer to colander.
  6. Cook carrots 5-7 minutes and transfer to colander with the rest of the vegetables.
  7. Transfer vegetables from colander to a another bowl.Add herbs,garlic,and 1 cup of the marinade.Mix well to combine all the ingredients.
Schema/Recipe SEO Data Markup by ZipList Recipe Plugin
http://delightsofculinaria.com/eggplant-salad/


Rogaliki- Filled pastry cookies

Rogaliki
image_print

Rogaliki

Rogaliki are soft,sweet,flaky Russian pastries that can be referred to cookies with variety of fillings and drenched in powdery white sugar.They are very simple and quick to make.Dough is very delicate and not too doughy.You can actually taste the filling.These little pastries treats always bring good memories of my childhood years.We would make them with mom all the time.

2 cups sour cream(400 grams)

3 1/2 stick butter (400 grams)room temperature

1 cup sugar

1 tablespoon vinegar

1/2 teaspoon salt

6 cups all purpose or whole wheat pastry flour


Fillings-

Crushed walnuts with sugar

jam

raisins

cooked poppy seeds*with sugar and crushed walnuts(walnuts optional)

*grind poppy seeds using meat grinder after they are cooked.


In a mixing bowl combine  flour,salt, and sugar.Cut in butter until mixture is coarse and crumbly.Mix in the rest of ingredients and place it in fridge for 2 hours.

photo 1

 Divide the dough 6 portions. Roll the one portion at a time on a well floured surface.

photo 2

Using a pastry cutter or knife,cut 8-12 triangles.(depending on what size you like them to be)

Place desired filling on the edge of a triangle.

photo 3

Roll it up and place it on prepared baking pan with parchment paper.

photo 4

Bake for 15-17 minutes on 350 degrees

Let them cool.Add powdered sugar to a bowl and in several batches, throw rogaliki in the bowl and mix until they are fully covered in sugar.

DSC_4674

Cabbage Salad with Pepper and Carrots

cabbage salad
image_print

cabbage salad

Cabbage is very popular vegetable in Russian cuisine.We make salads,we make soups,we make golupsi,piroshki,and braised cabbage.Cabbage is very nutritious and delicious! I prepare variety of cabbage salads often,because my whole family loves this vegetable.This salad crunchy,a little tangy with little sweetness from carrots and bell peppers.

1 cabbage

2-3 carrots

1 -1 1/2 red,yellow,or orange bell pepper

1 onion

1/4 cup vinegar

1 tablespoon salt

1 tablespoon sugar

1 cup oil + 1/2 onion round with tail or 1 small onion peeled

1 whole dry red chili pepper  or pepper flakes

Directions:

In a large mixing bowl,shred cabbage using a mandolin slicer.

Add sugar and salt to cabbage.Massage cabbage for a little.

Peel carrots and julienne thinly or grate them on top of cabbage.

Cut bell pepper in four equal parts.Slice bell pepper over carrots using a mandolin.

Peel onion.Cut onion in four equal quarters and slice thinly over bell peppers using mandolin slicer.

In a skillet or frying pan,heat oil with 1 small onion or 1/2 onion cut vertically(whole tail on) and chili pepper.Oil needs to get really hot (bottom of an onion should be really dark(black).

Meanwhile,pour vinegar over cabbage ,carrots,bell pepper ,and onion.

When the oil is ready and really hot,Pour it over the salad on the onions.

Mix until all the ingredients well combined.

This salad can be served right away or for best results next day.Can be stored in a glass jar for a week or so.


Cabbage Salad with Pepper and Carrots

Ingredients

  • 1 cabbage
  • 2-3 carrots
  • 1 -1 1/2 red,yellow,or orange bell pepper
  • 1 onion
  • 1/4 cup vinegar
  • 1 tablespoon salt
  • 1 tablespoon sugar
  • 1 cup oil + 1/2 onion round with tail or 1 small onion peeled
  • 1 whole dry red chili pepper or pepper flakes

Instructions

  1. In a large mixing bowl,shred cabbage using a mandolin slicer.
  2. Add sugar and salt to cabbage.Massage cabbage for a little.
  3. Peel carrots and julienne thinly or grate them on top of cabbage.
  4. Cut bell pepper in four equal parts.Slice bell pepper over carrots using a mandolin.
  5. Peel onion.Cut onion in four equal quarters and slice thinly over bell peppers using mandolin slicer.
  6. In a skillet or frying pan,heat oil with 1 small onion or 1/2 onion cut vertically(whole tail on) and chili pepper.Oil needs to get really hot (bottom of an onion should be really dark(black).
  7. Meanwhile,pour vinegar over cabbage ,carrots,bell pepper ,and onion.
  8. When the oil is ready and really hot,Pour it over the salad on the onions.
  9. Mix until all the ingredients well combined.
  10. This salad can be served right away or for best results next day.Can be stored in a glass jar for a week or so.
Schema/Recipe SEO Data Markup by ZipList Recipe Plugin
http://delightsofculinaria.com/cabbage-salad-with-pepper-and-carrots/

Roasted Turkey

DSC_4613
image_print

Roasted turkey

Thanksgiving is a planned-ahead holiday dinner with a turkey being the superstar.The first recipe came from my mother-in-law that has been used for many many years.Turkey always comes out tender,moist,and full of flavor.It requires minimum ingredients and very easy roasting method.I like to make this turkey stuffed with Buckwheat(grechka) or rice and mushrooms.My personal pick is buckwheat.

Second recipe is adapted from Anne Burrell (tastebook.com).The turkey is brined in a herby salty solution for 3 days.Then the turkey is rubbed with herby butter and left uncovered in the fridge for another day/night.So it requires 4 days in advance to prepare.It is roasted uncovered and requires basting every 30 minutes.The skin comes out very browned and crispy.The pan juices are used to make a delicious gravy.

Recipe #1-

1 turkey (12-15 lbs)

2-3 garlic bulbs peeled and crushed through garlic press + 1 peeled(not crushed)

1 1/2 cup mayonnaise

2 tablespoons salt

2 tablespoons black pepper

1 oven bag(recommended) or foil.

Stuffing-

2 cups rice or buckwheat

1 onion finely chopped

1 carrot grated

1 1/2 cups sliced mushrooms

oil for sautéing

salt and pepper.


DIRECTIONS:

Rinse and pat dry turkey with paper towel.

Combine mayonaisse,garlic,salt and pepper  a bowl.

Carefully separate the skin on breast and thighs.Make little slits in the turkey breast (going under  the skin)Insert garlic cloves from one garlic into the breast.

Apply garlic-mayo mixture under the skin,inside and all over the turkey.

Prepare stuffing-

Cook rice or buckwheat halfway with 1/2 teaspoon salt.

Heat oil in a skillet or sauté pan.Add onions and carrots.Sauté until onions are soft.Transfer onions and carrots from skillet to rice/buckwheat.

Add a little oil to the skillet.Throw in mushrooms.Saute them until all liquid is absorbed.Transfer  mushrooms to rice/buckwheat.

Mix rice/buckwheat with mushrooms,onions,carrots and black pepper.

Stuff turkey with rice/buckwheat stuffing inside including filling in the space on the leg/thigh.

Tie the turkey legs together with cooking twine.

Place the turkey in a oven bag ,then on the roasting pan.

Refrigerate for 3 days.

Heat oven to 425 degrees.Roast the turkey for 30-40 minutes then reduce heat to 350 degrees.

Roast turkey for approximately 3 – 3 1/2 hours. Pour pan juices all over the turkey and stuffing.Strain pan juices,separate the fat and use the juices to make gravy if

desired.

*In case you need to expedite marinating process,cut little slits all over turkey.Marinate 24-48 hours.


Recipe #2-

FOR THE BRINE
3/4 cup kosher salt

1/3 cup sugar

2 onions, cut into 1/2-inch dice

2 carrots, cut into 1/2-inch dice

3 celery ribs, cut into 1/2-inch dice

1 whole garlic bulb, cut in half equatorially

1/2 bunch of fresh rosemary

1/2 bunch of fresh sage

2 tablespoons coriander seed

2 tablespoons fennel seed

6 bay leaves

1 teaspoon crushed red pepper

FOR THE HERB BUTTER

1/2 pound (2 sticks) unsalted butter, at room temperature

1/2 bunch of fresh rosemary, leaves finely chopped

1/2 bunch of fresh sage, leaves finely chopped

Kosher salt

FOR THE GRAVY
2 onions, cut into 1/2-inch dice

2 carrots, cut into 1/2-inch dice

2 celery ribs, cut into 1/2-inch dice

4 cloves garlic, smashed

1 thyme bundle

3 bay leaves

2 quarts chicken stock

3/4 cup all-purpose flour

2 cups dry white wine

PREPARATION

TO BRINE THE TURKEY

  1. In a container large enough to accommodate all the ingredients including the turkey, combine 2 gallons water with the salt, sugar, onions, carrots, celery,garlic, rosemary, sage, coriander seed, fennel seed, bay leaves, and crushed red pepper. Stir to combine.
  2. Submerge the turkey in the brine. Cover and refrigerate for 3 days.

TO PREPARE THE TURKEY FOR ROASTING

  1. The night before you are planning to roast the bird, remove it from the brine and pat it dry with paper towels.
  2. In a small bowl, combine the butter, rosemary, sage, and some salt. Using your fingers, carefully work your way under the skin of the turkey to separate it from the breasts and legs.
  3. Massage the herb butter under the skin of the breast and legs, then all over the outside of the bird as well.
  4. Tie the turkey’s legs together with cooking twine.
  5. In the bottom of your roasting pan, for the gravy, combine the onions, carrots, celery, garlic, thyme bundle, and bay leaves. Season with salt.
  6. Place the turkey on top of the veggies and put in the fridge overnight uncovered.This allows the skin of the turkey to dry out and creates a gorgeous, brown, crispy skin.
  7. Preheat the oven to 450°F.
  8. Pour 2 cups of the chicken stock into the roasting pan and put the turkey in the hot oven for 35 to 40 minutes, or until the turkey becomes beautifully browned.
  9. Reduce the heat to 350°F. Baste the turkey with the pan juices and rotate the pan every 30 minutes for the remainder of the cooking time. Think 17 minutes per pound .(About 3 – 3 1/2 hours for 15 lbs.)
  10. If the turkey starts to get too brown, tent it loosely with aluminum foil. . Transfer turkey  to a rimmed baking sheet, cover it loosely with aluminum foil, and let rest for at least 30 minutes.

TO MAKE THE GRAVY

  1. Using a mesh strainer, strain the veggies out of the cooking liquid over a large bowl and allow the fat to rise to the top of the cooking liquid. Discard the veggies. Save the roasting pan, but don’t wash it — you still need it.
  2. Skim the fat off the surface of the cooking liquid. Place the roasting pan directly on a burner, add the skimmed fat to the pan, and bring it to medium heat.
  3. Whisk in the flour and cook the mixture until it has the consistency of wet sand. Whisk in the wine and cook for 4 to 5 minutes.
  4. Add the reserved cooking juices and the remaining chicken stock to the flour mixture. Bring the liquid to a boil and reduce to a simmer . Cook until the mixture is the consistency of thick gravy, about 10 minutes. Taste and season with salt if needed.
  5. Carve the turkey and serve with the gravy and mashed potatoes.